
Here is a fun starter pumpkin. The teeth were so much fun to do. Start with a medium size pumpkin that weighs about 10-12 pounds
Step 1:

Be creative in your slection of tools. For the initial “skinning”, I like a cantelope scoop but an ice cream or cookie scoop wors well also. In the middle of this image are the clay sculpting tools that come in handy for eye lids and that nice separation of the teeth. Also good for those finer cuts are the palm held wood carving tools. The “V” and “U” shaped edges come in very handy. A marker comes in handy, particlarly when you are deciding on the “haircut” but be careful to make the marks outside of what you want to have showing because sometimes that black ink stays forever.
Step 2:
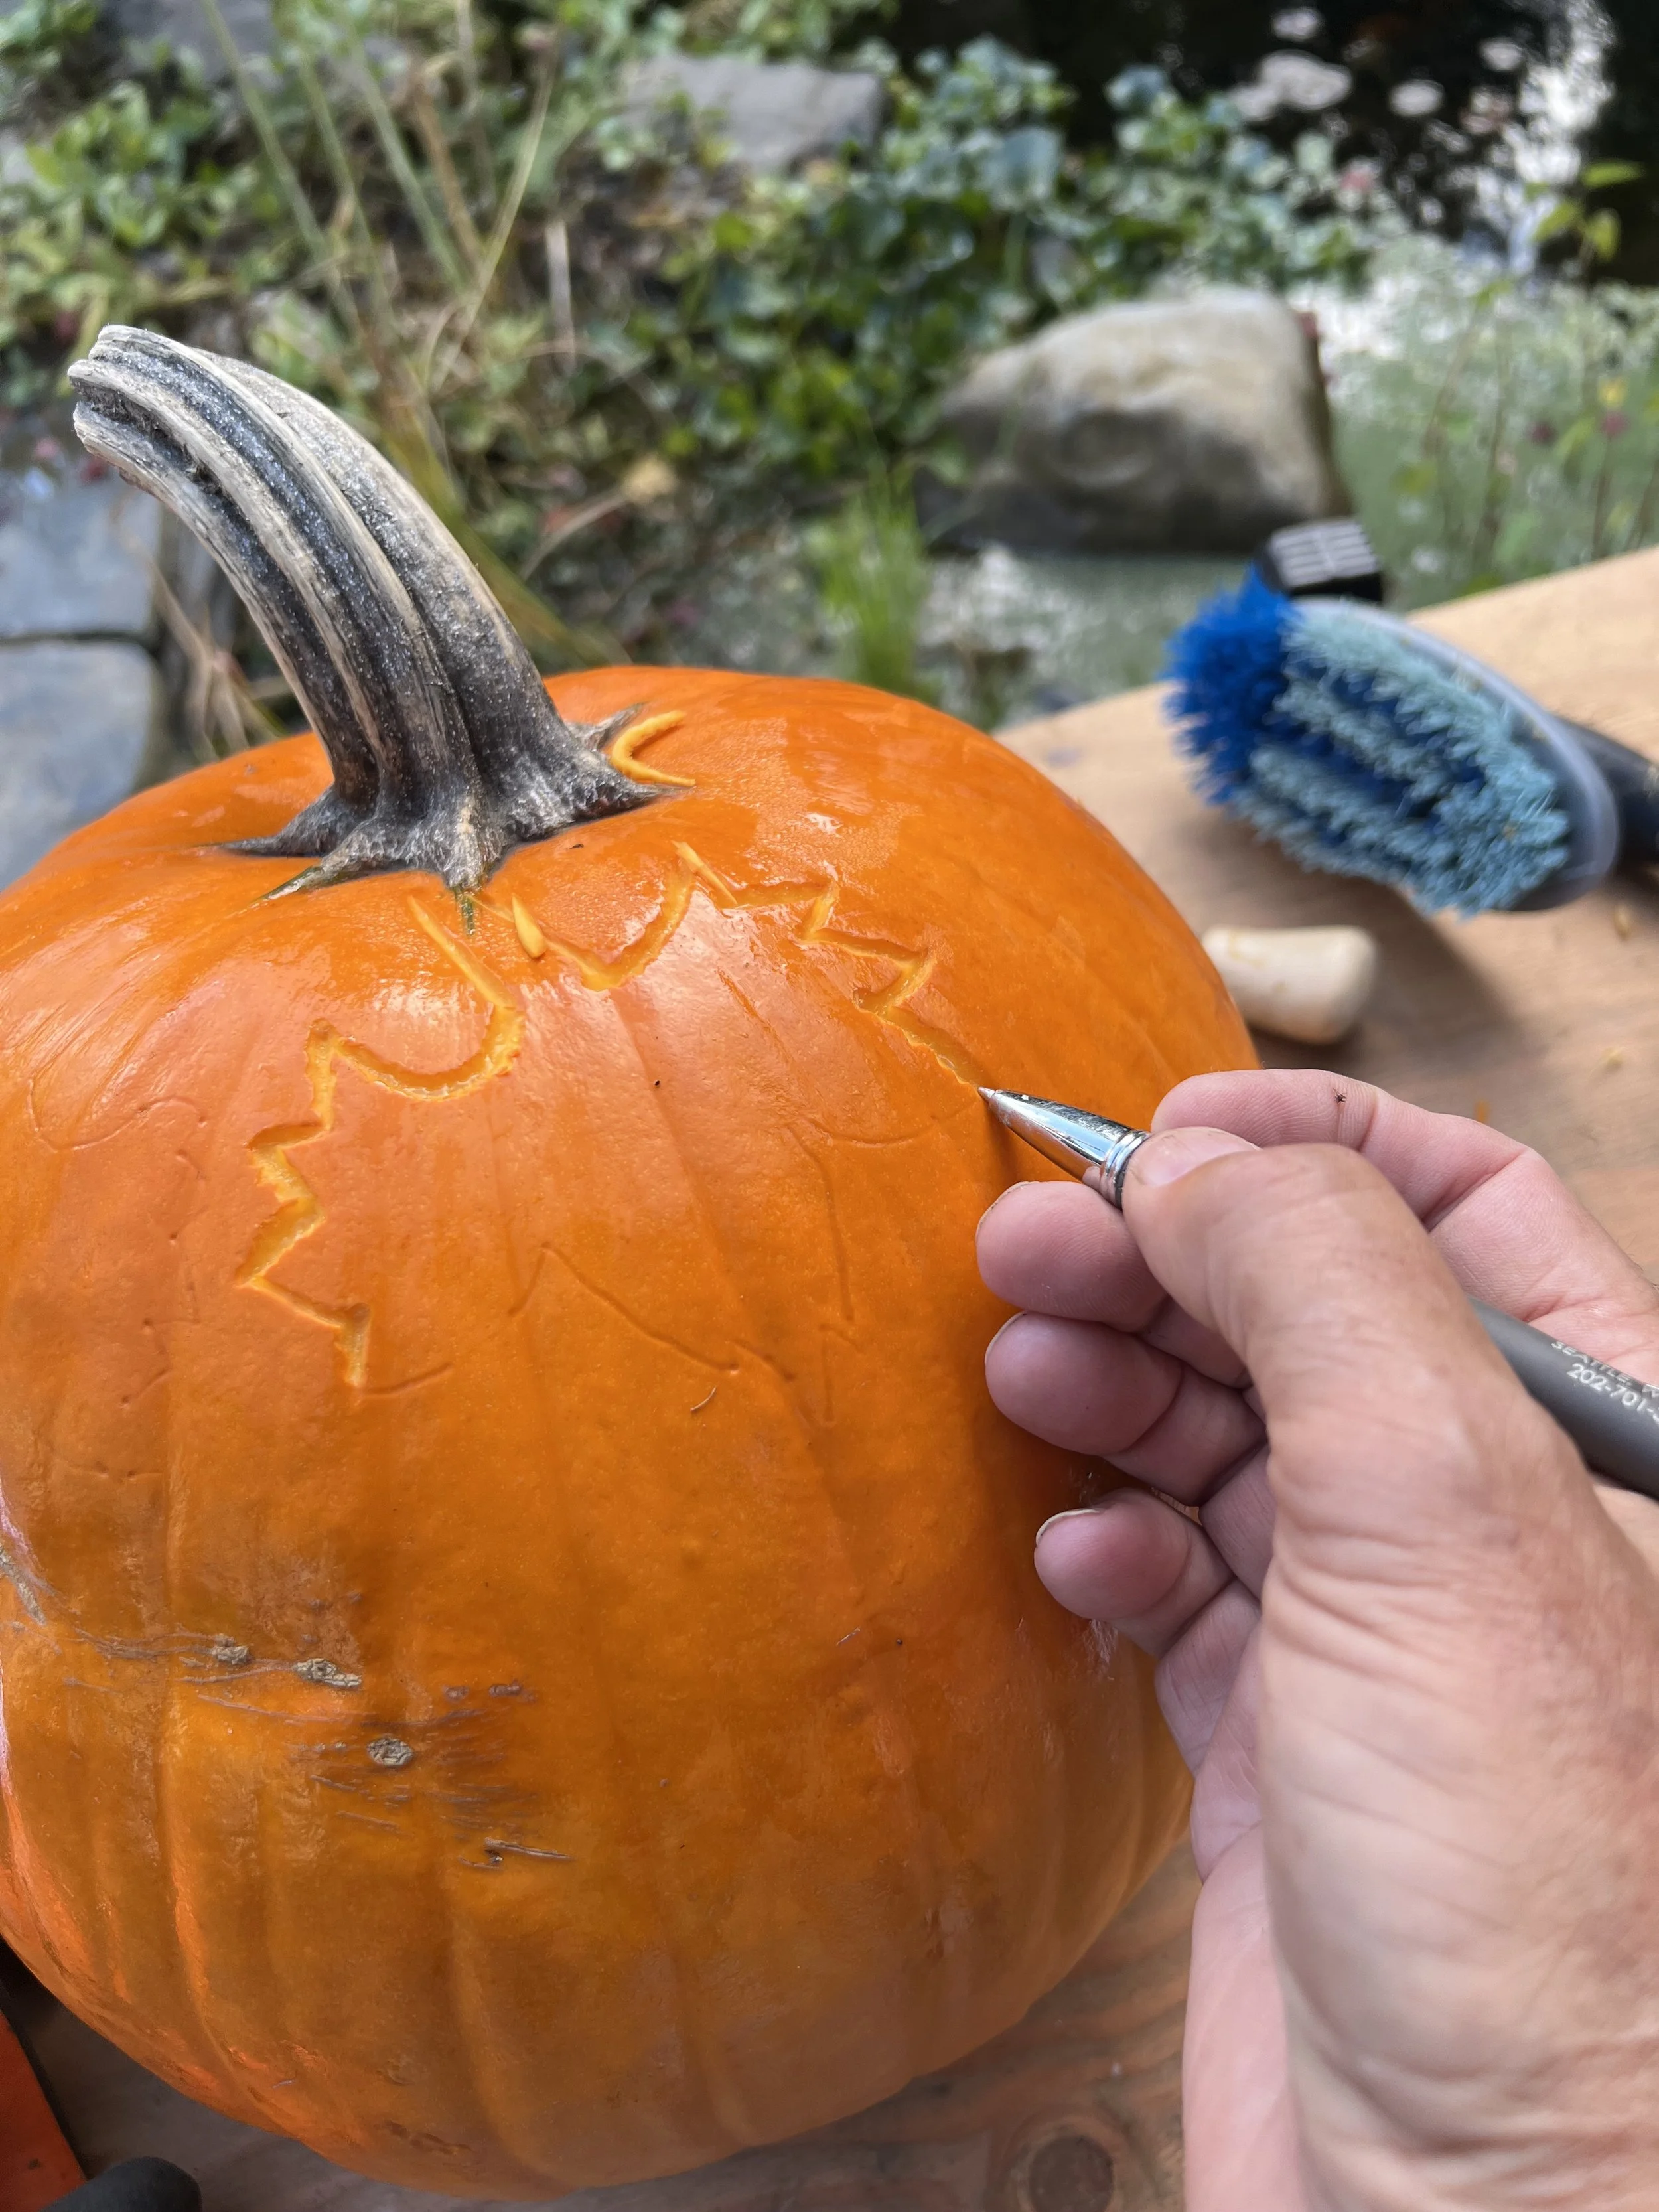
One of the few times you will use a knife. Cut an outline of how you want the “hair line “ to look. Here I have done sort of a jagged maple leaf design. Don’t go too deep, just enough to leave a clear ridge
Then, use the cantelope scoop and remove the orange skin
Step 3:
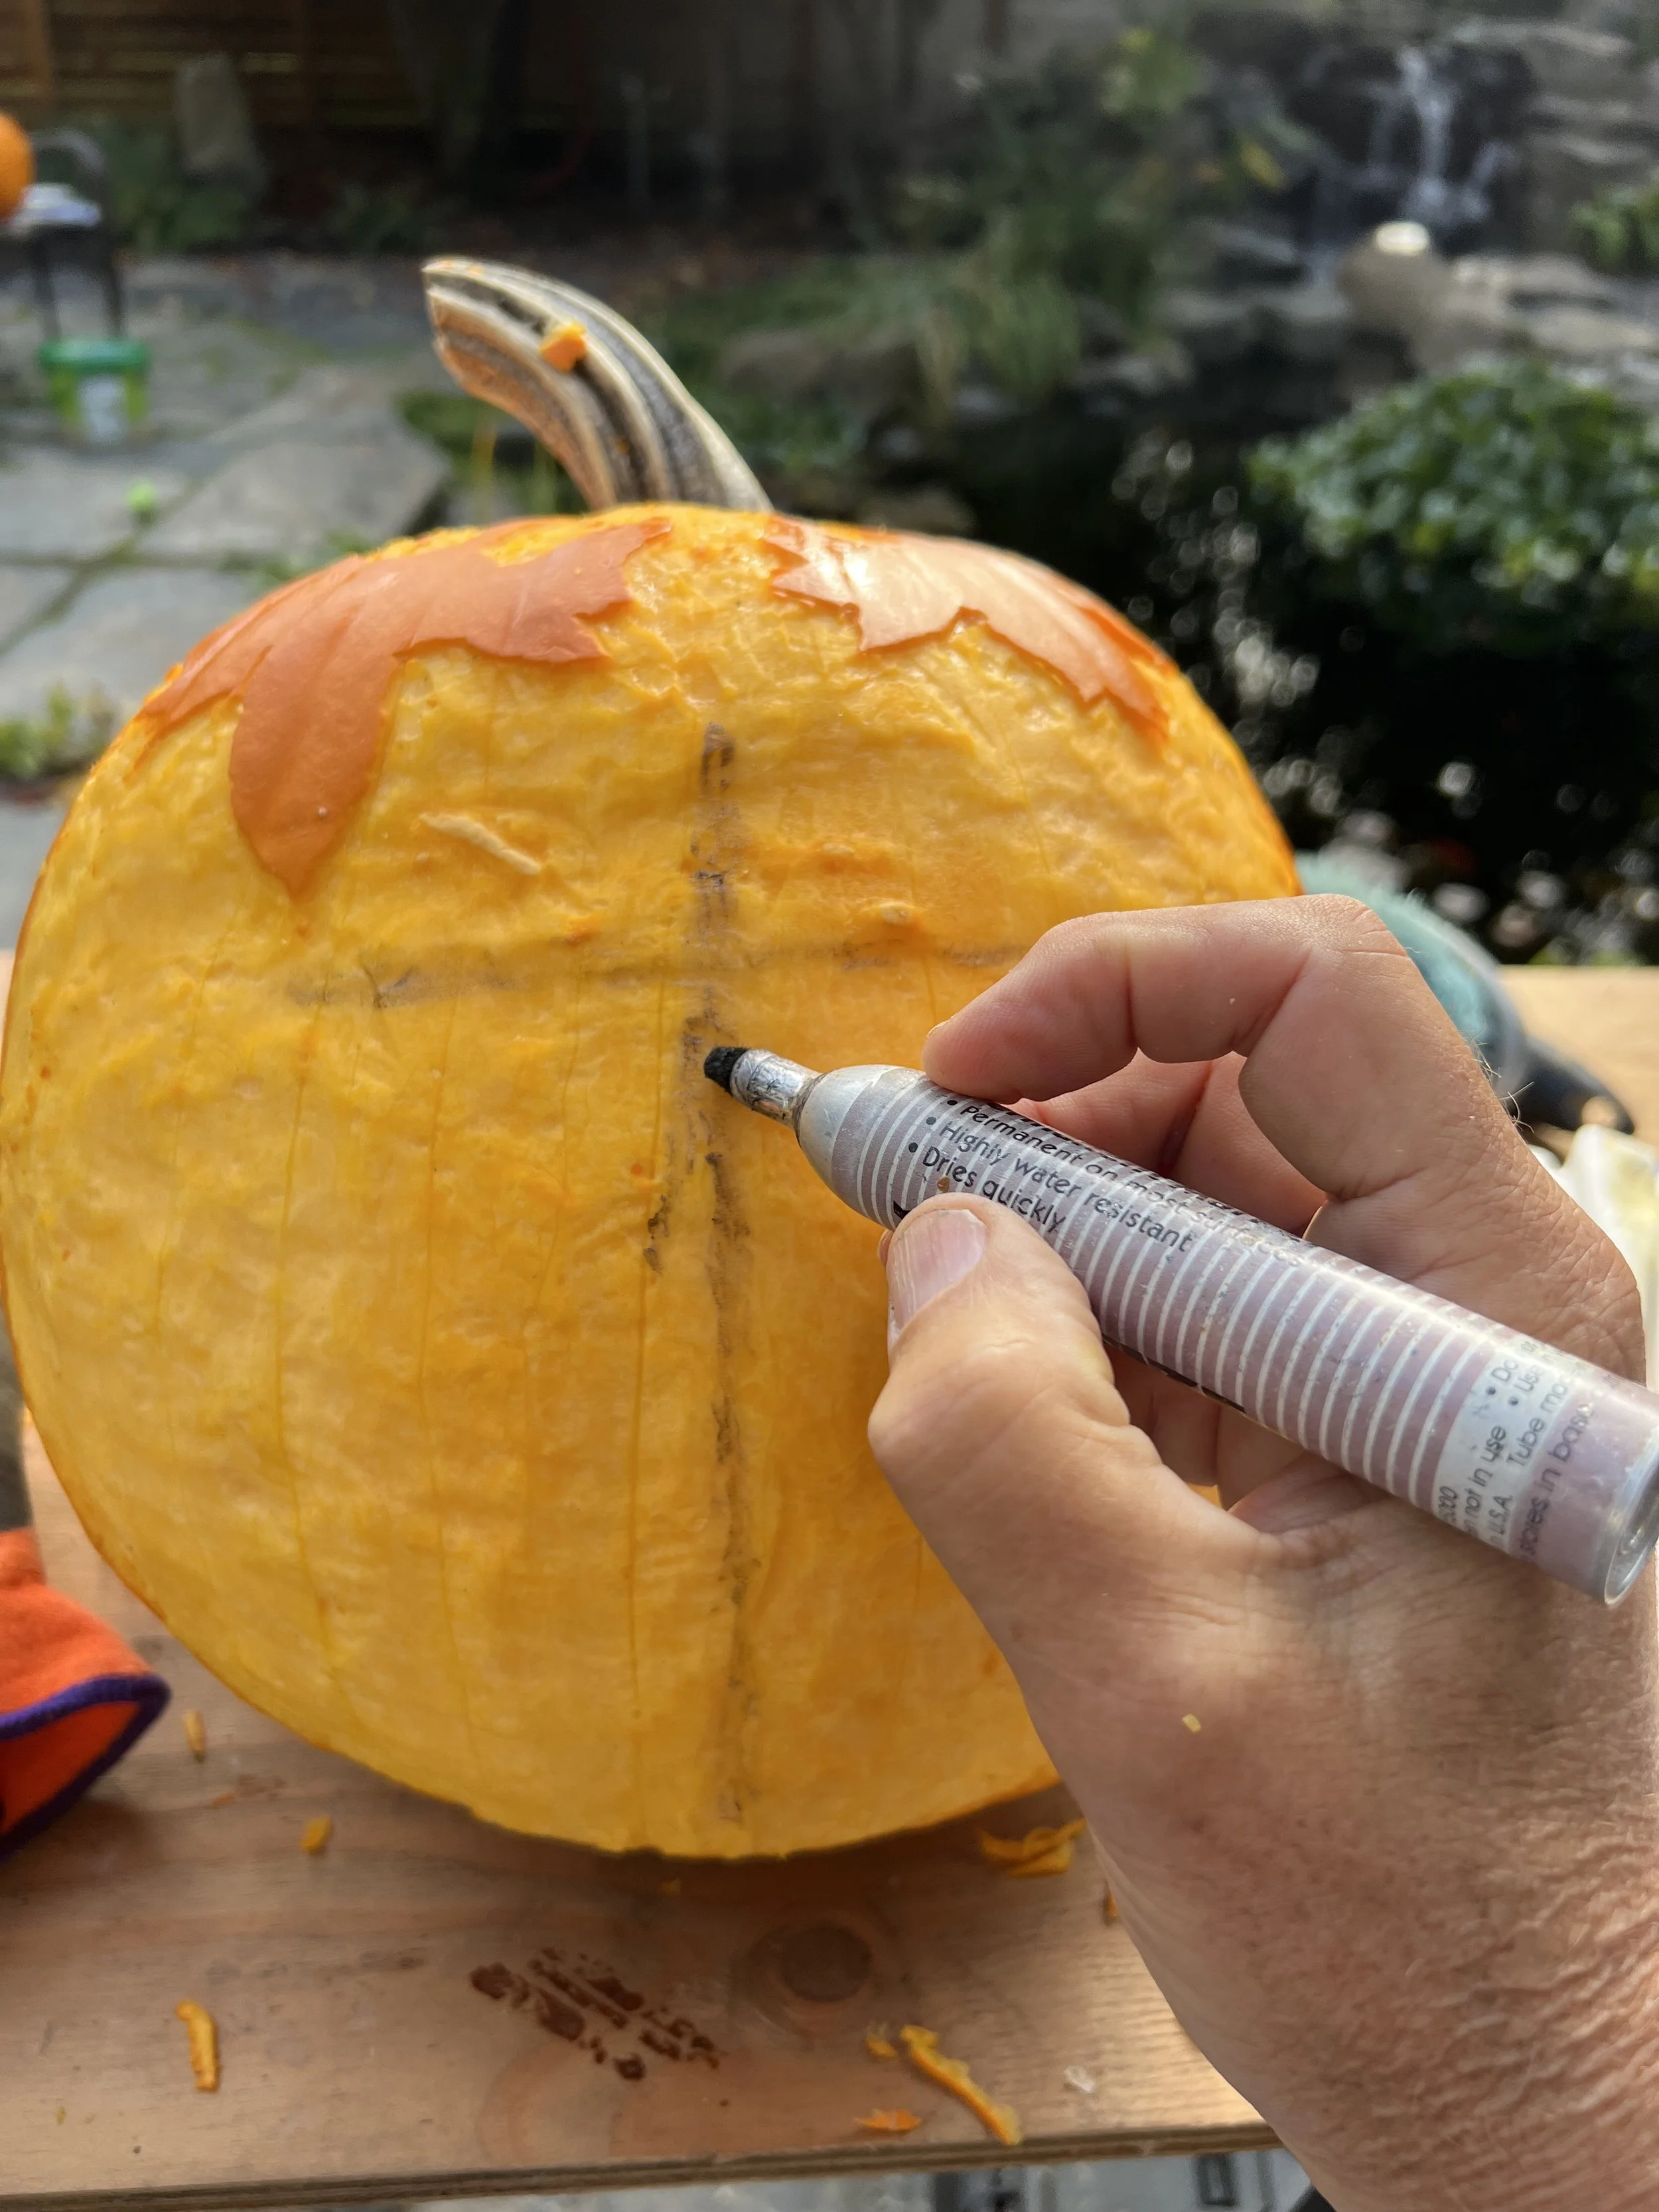
Here I am drawing in the placement of the eyes (horizontal line) and the center of the face (vertical line). There are many good guidelines on how to align the eyes to the length of the nose, etc. but we are going to ignore the usual one third, one third, one third rule. Yes, your eyes are roughly one third down from the top of your head, but our critter has a big goofy smile.
By the way, a comprehenive resource for sculpting or drawing the face is The Artist’s Complete Guide to Facial Expression.
Spoiler alert, it is 288 pages just on the face!
Step 4:
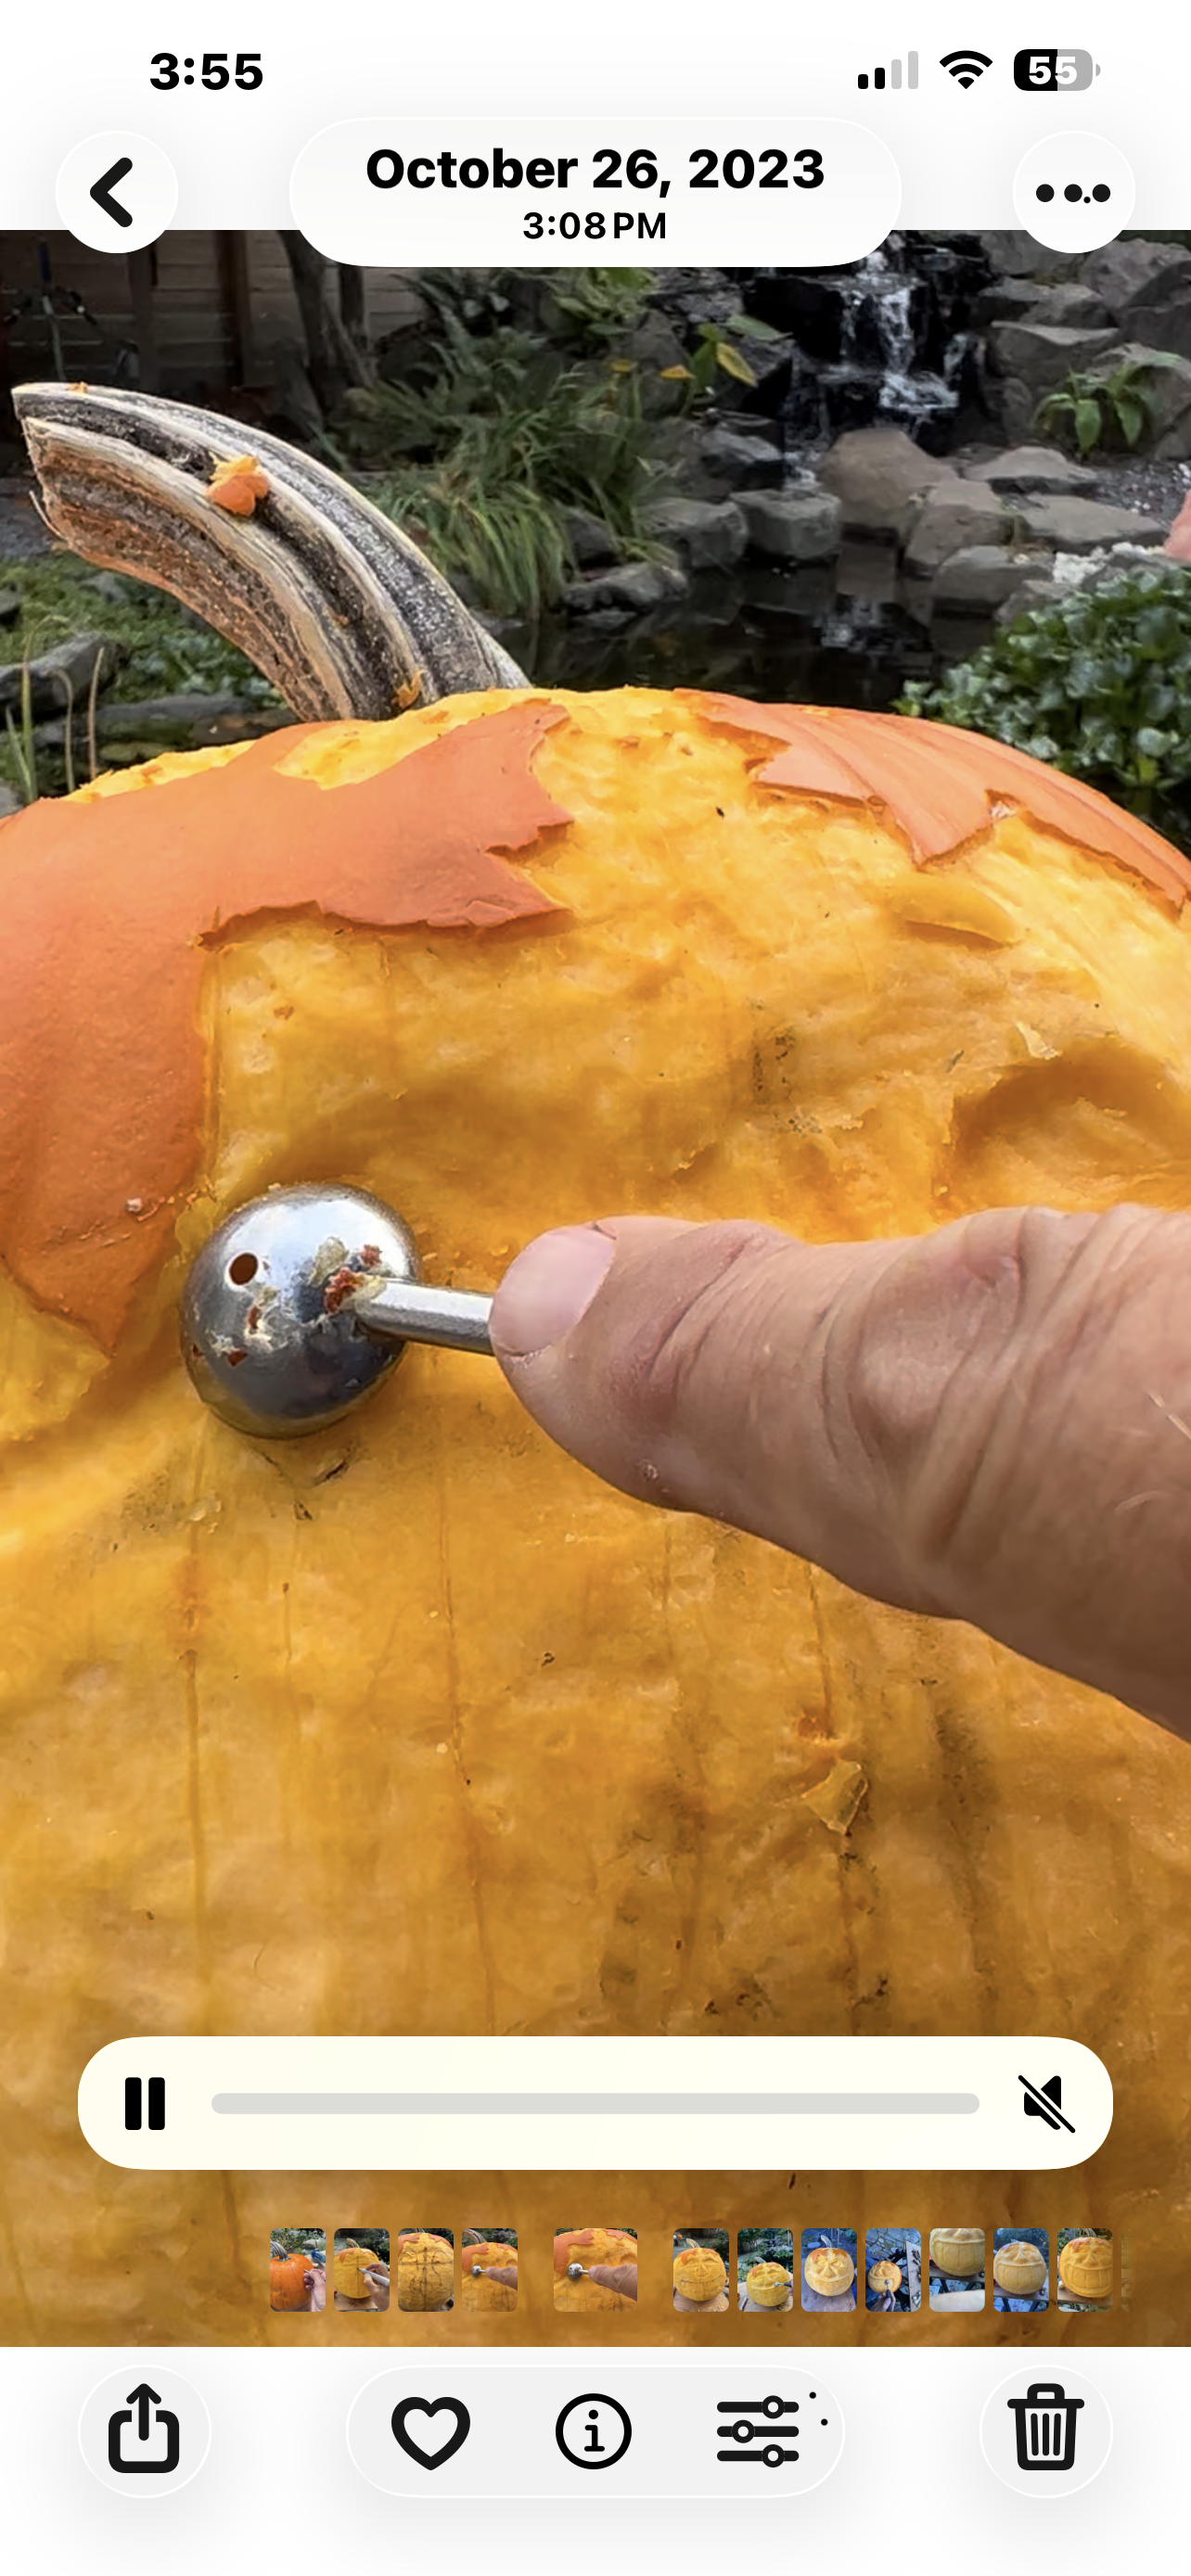
I am now using a canelope scoop to create the eye sockets. You can also use the clay shaping loops if you have them.

Step 5:
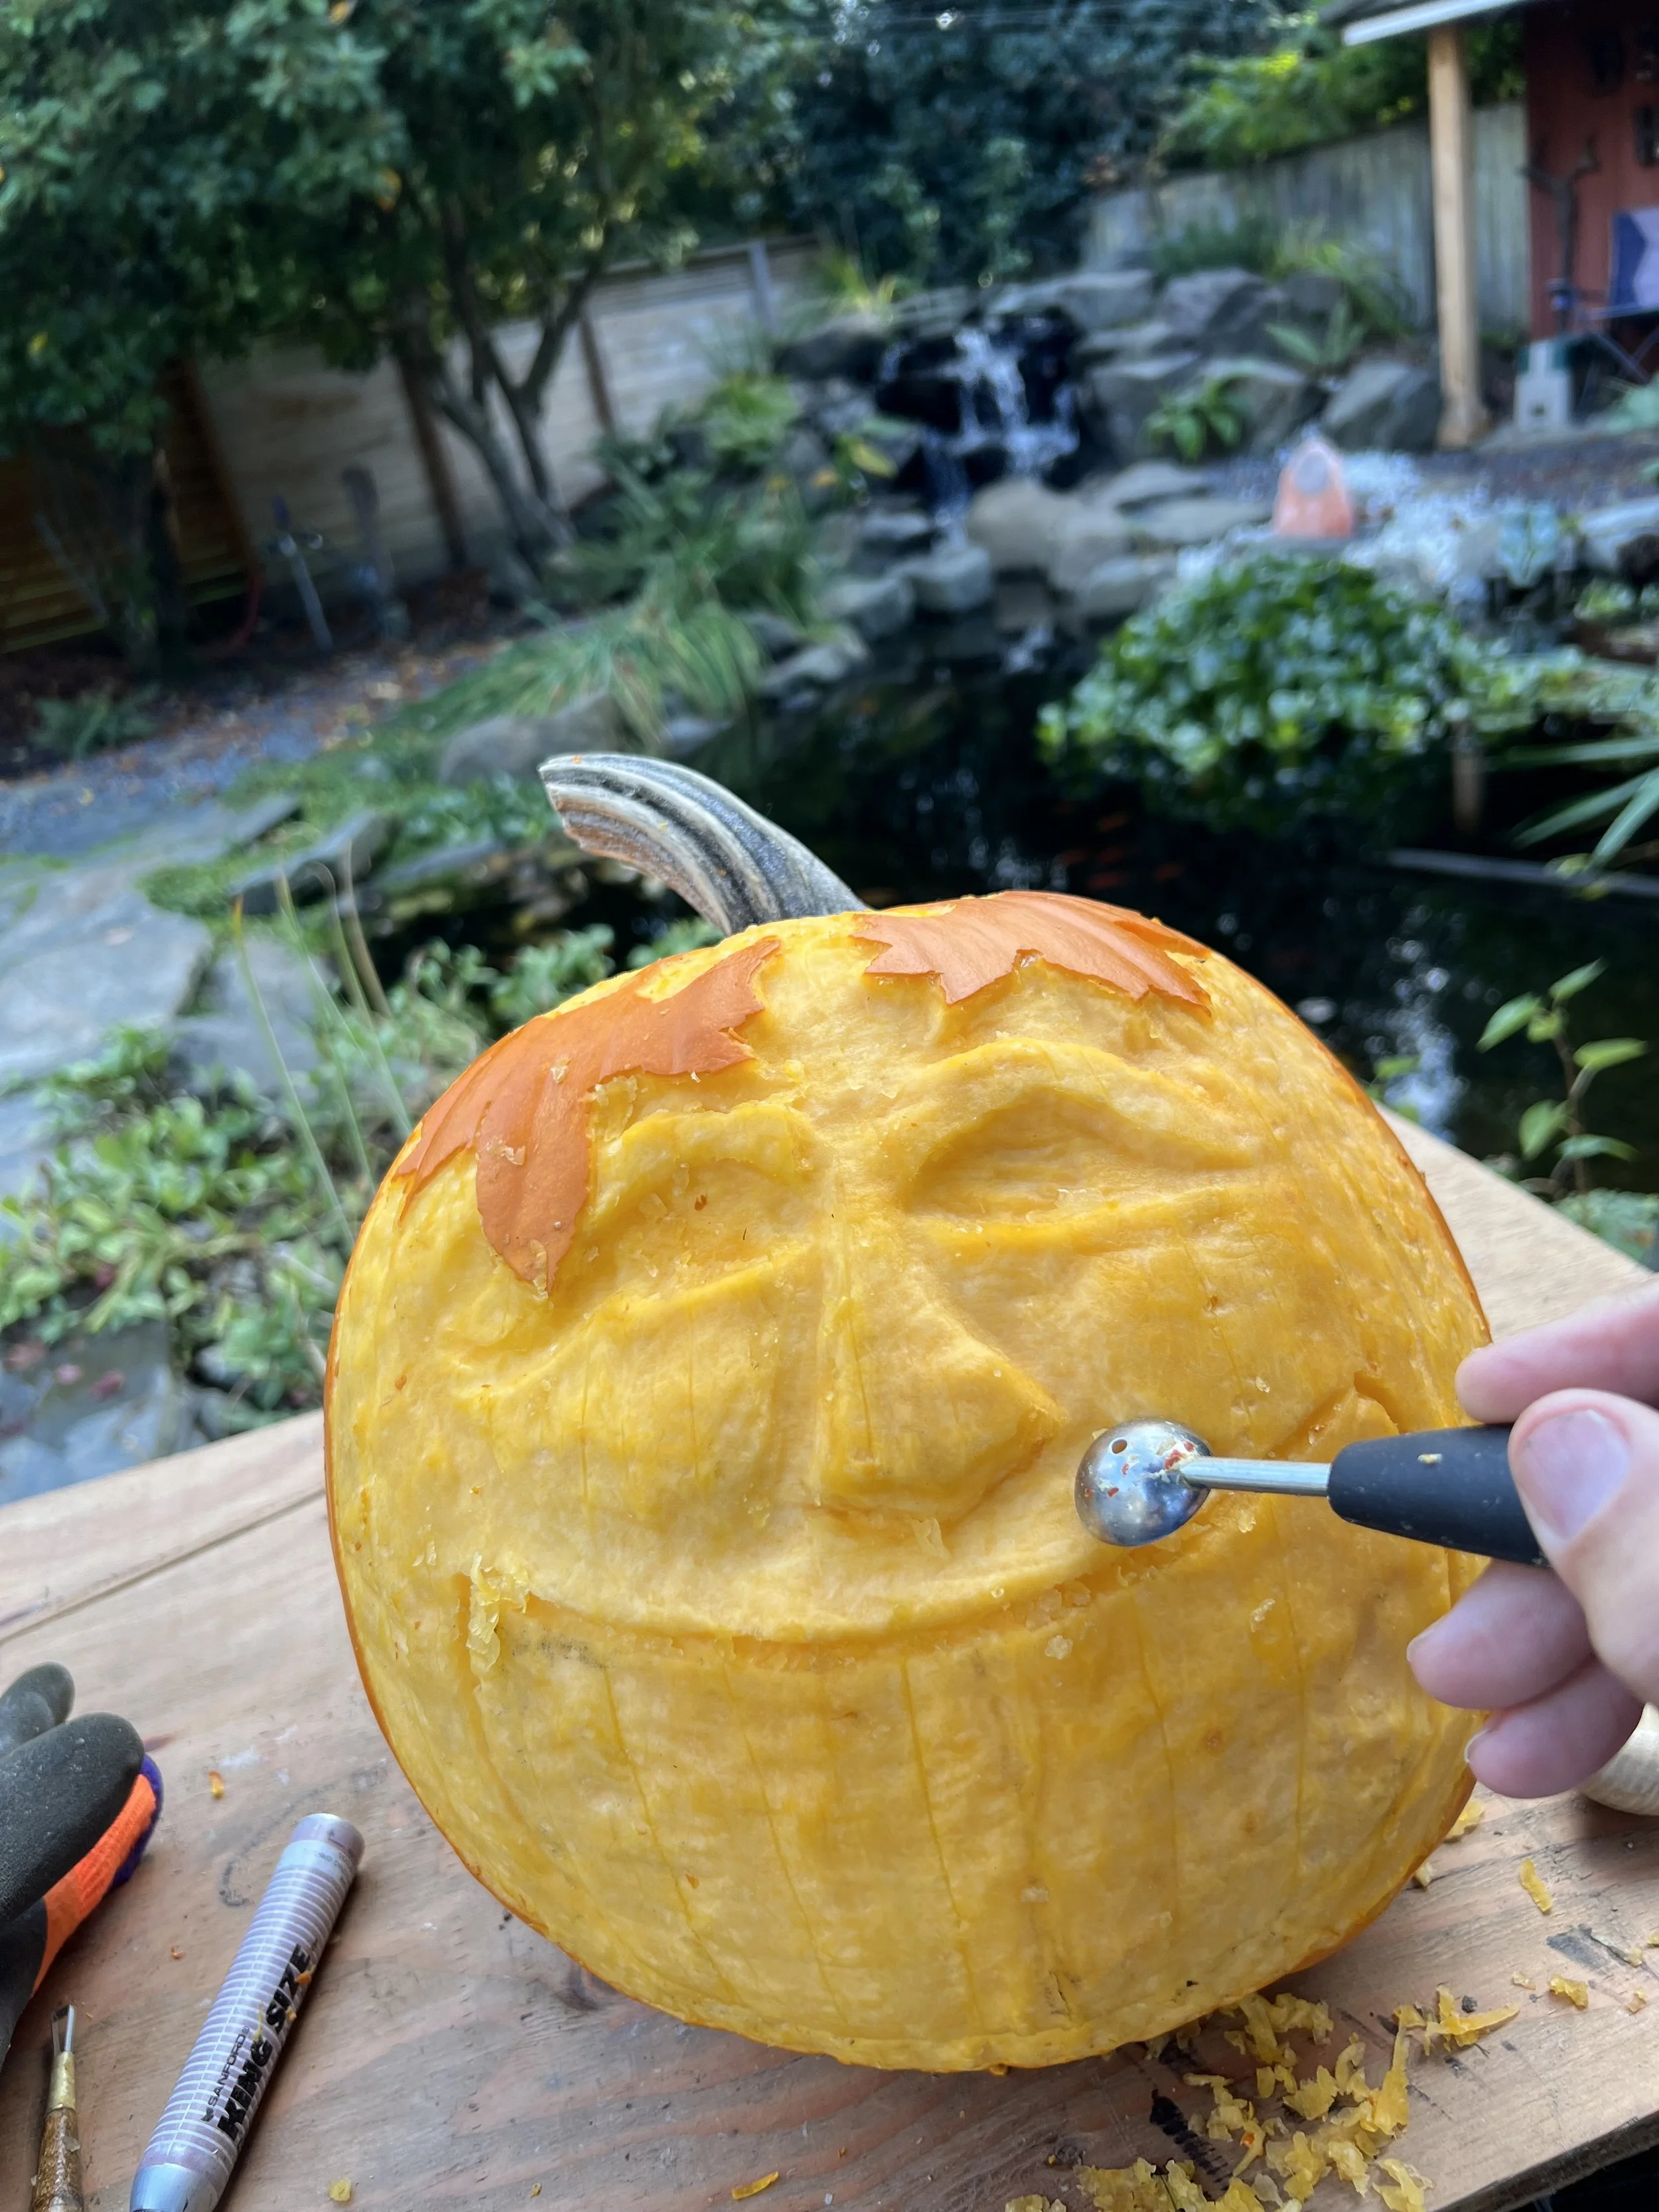
Now I have roughed out the nose and drawn in the big smile. Note the triangle shape of the upper eyes This gives our little character a happy look.
Step 6:
Here I have used the scoop or loops to dig down under the nose to start forming those happy cheeks and the smiling curve of the upper lip. I have also used a vine gouge tool to split the brow above the eyes to give the sense of eyelids.
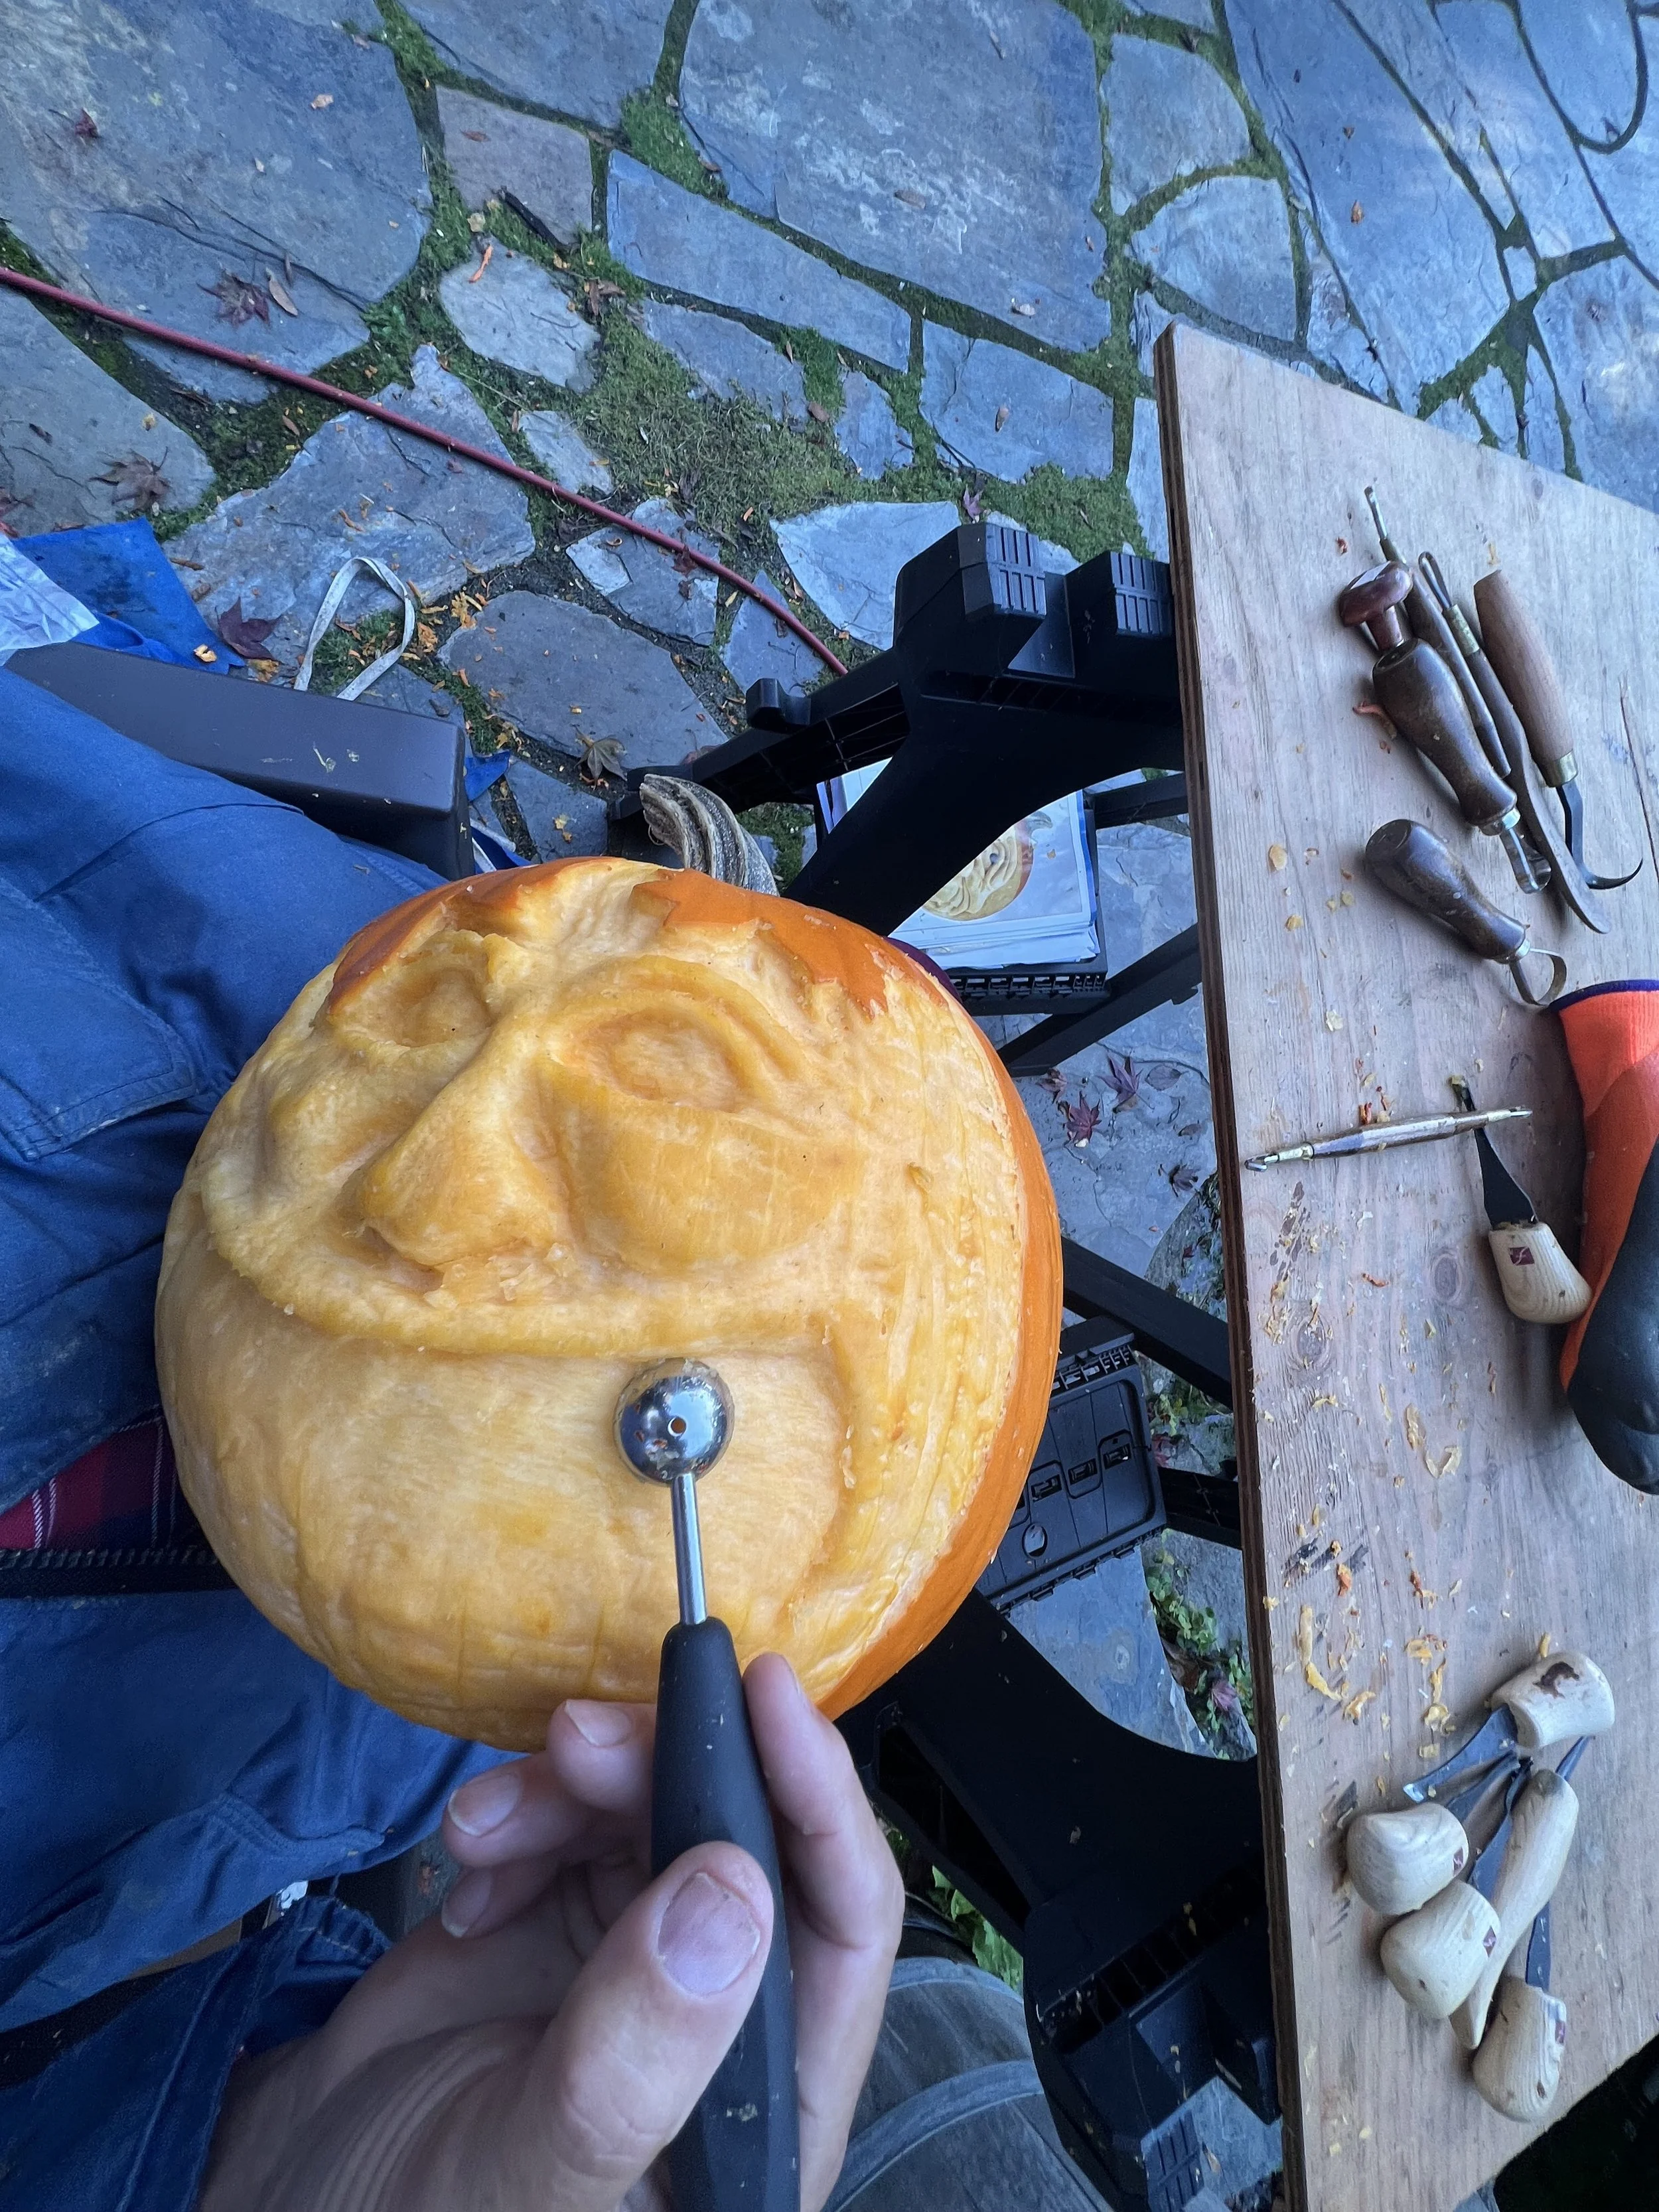
Step 7:
Ahhh, and here comes the fun part, scraping out the mouth area to let our big smile show some expensive and well cared for teeth
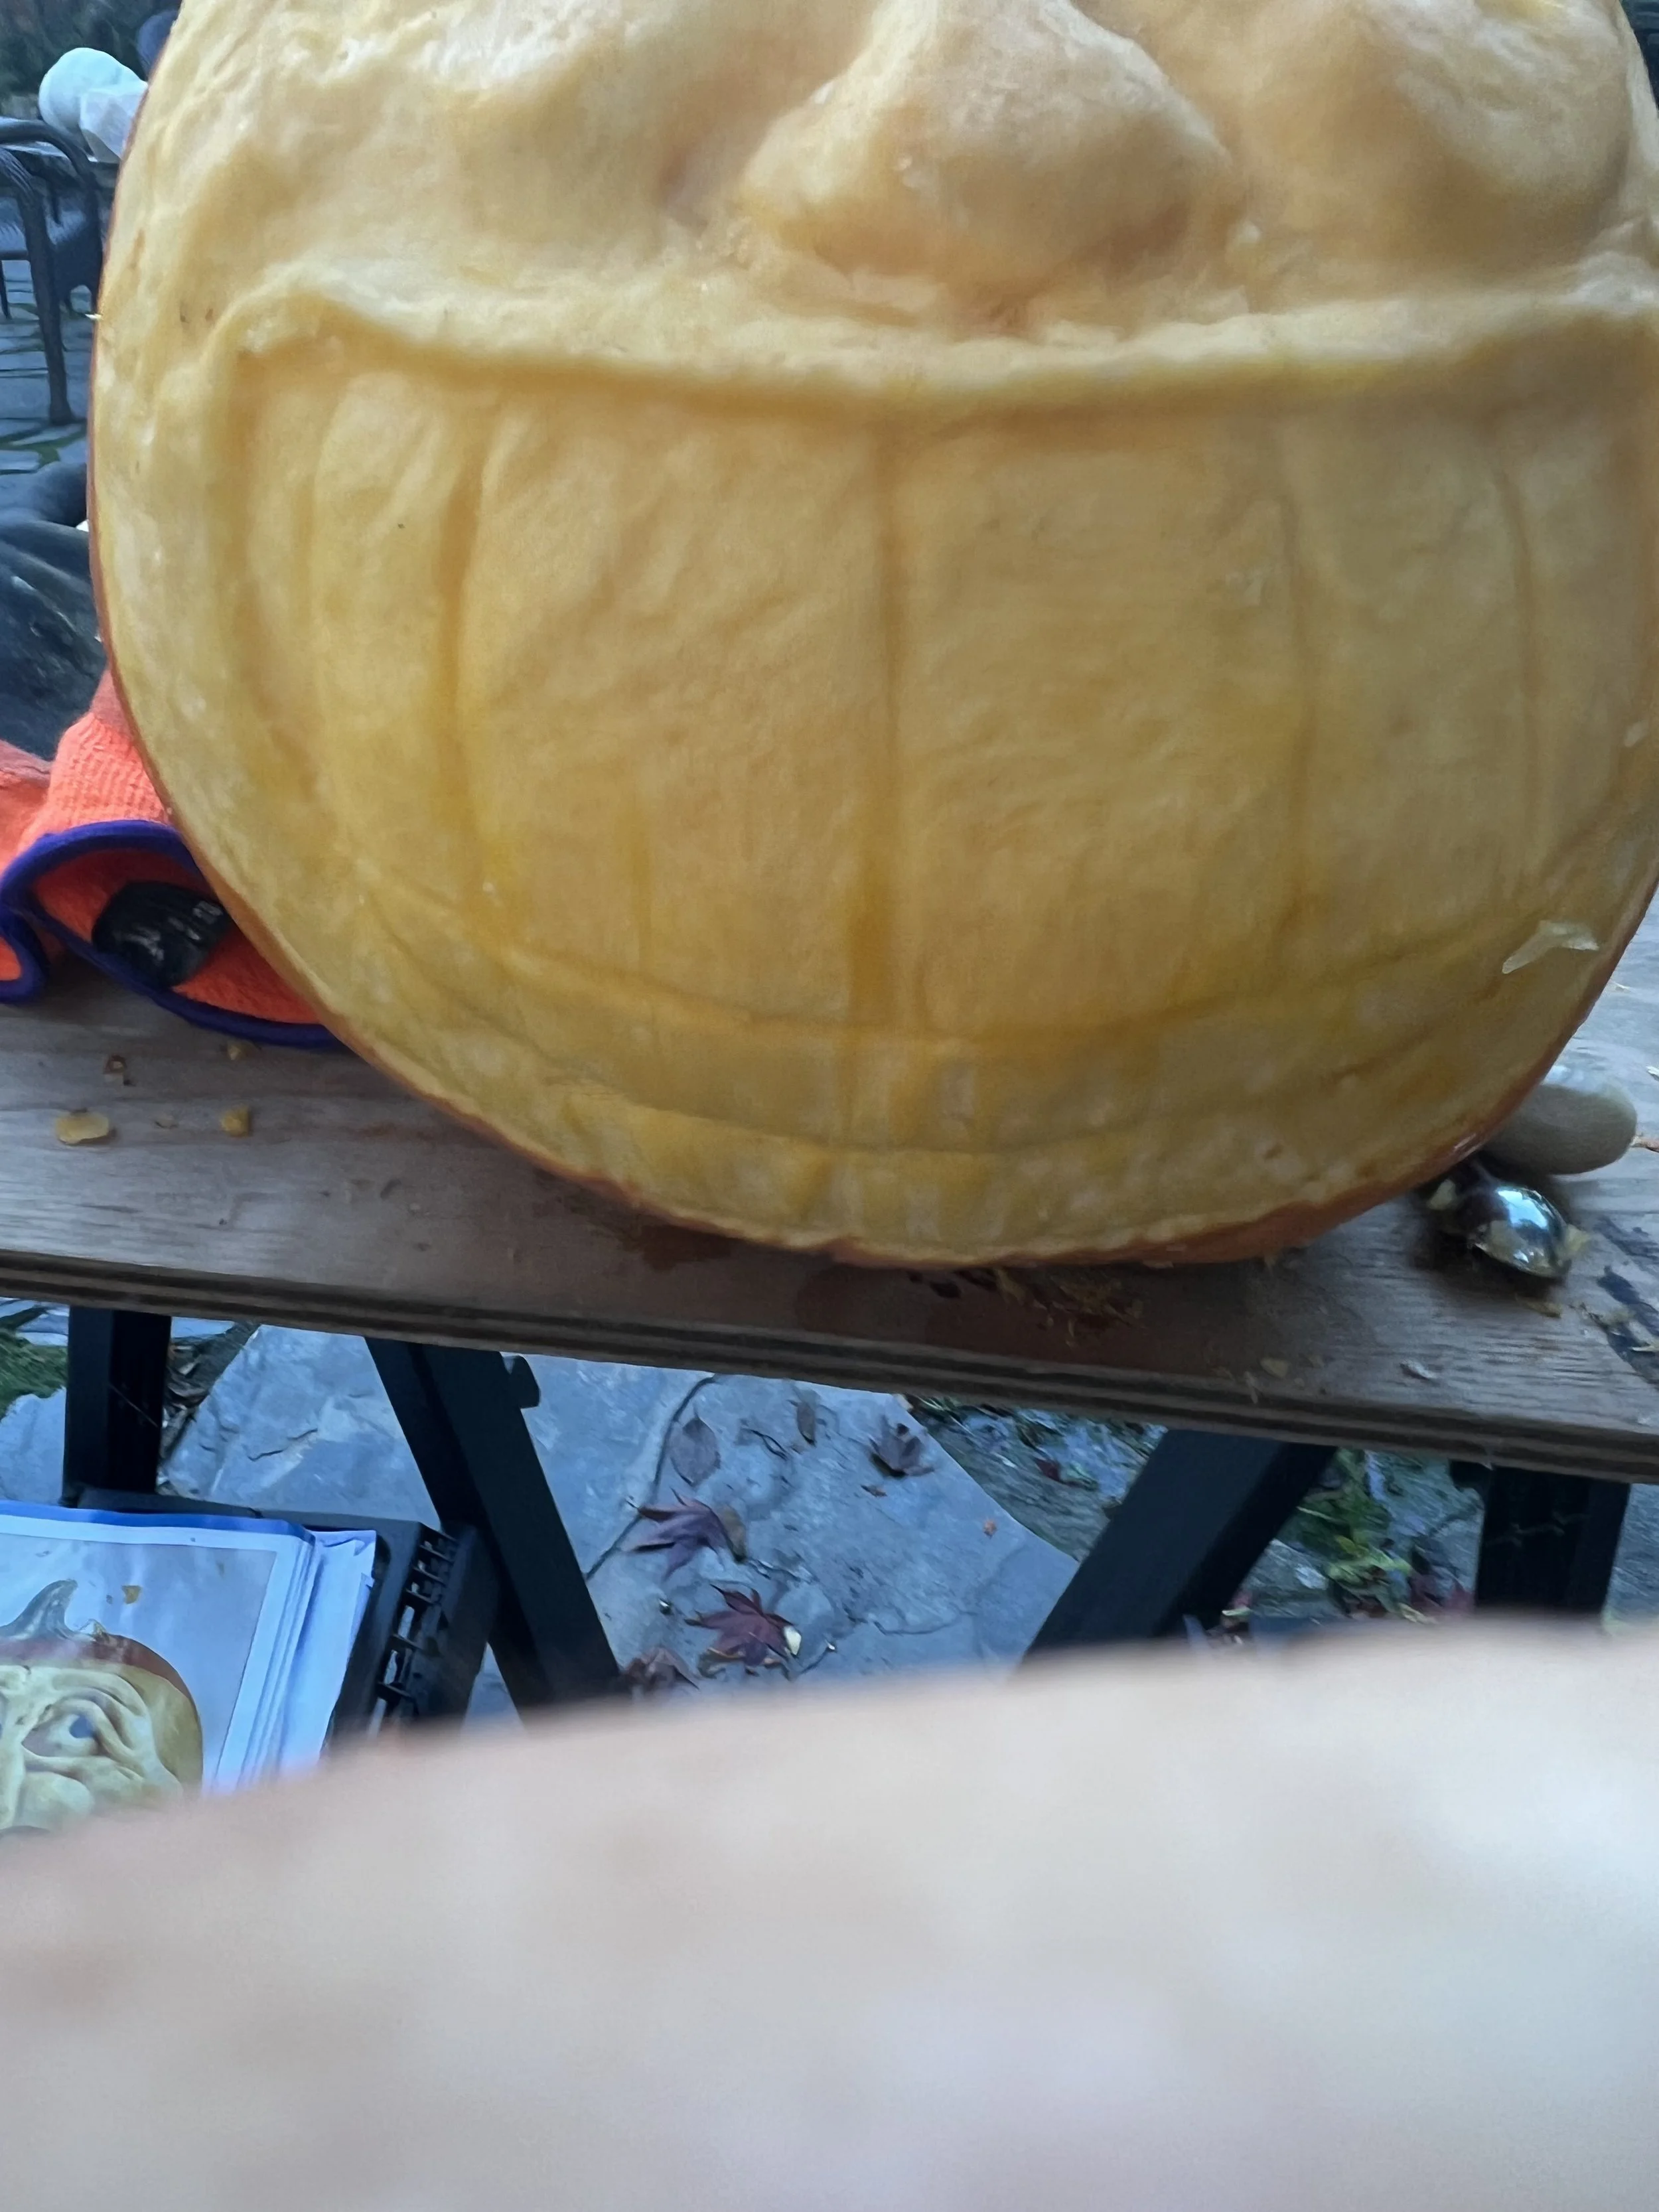
Step 8:
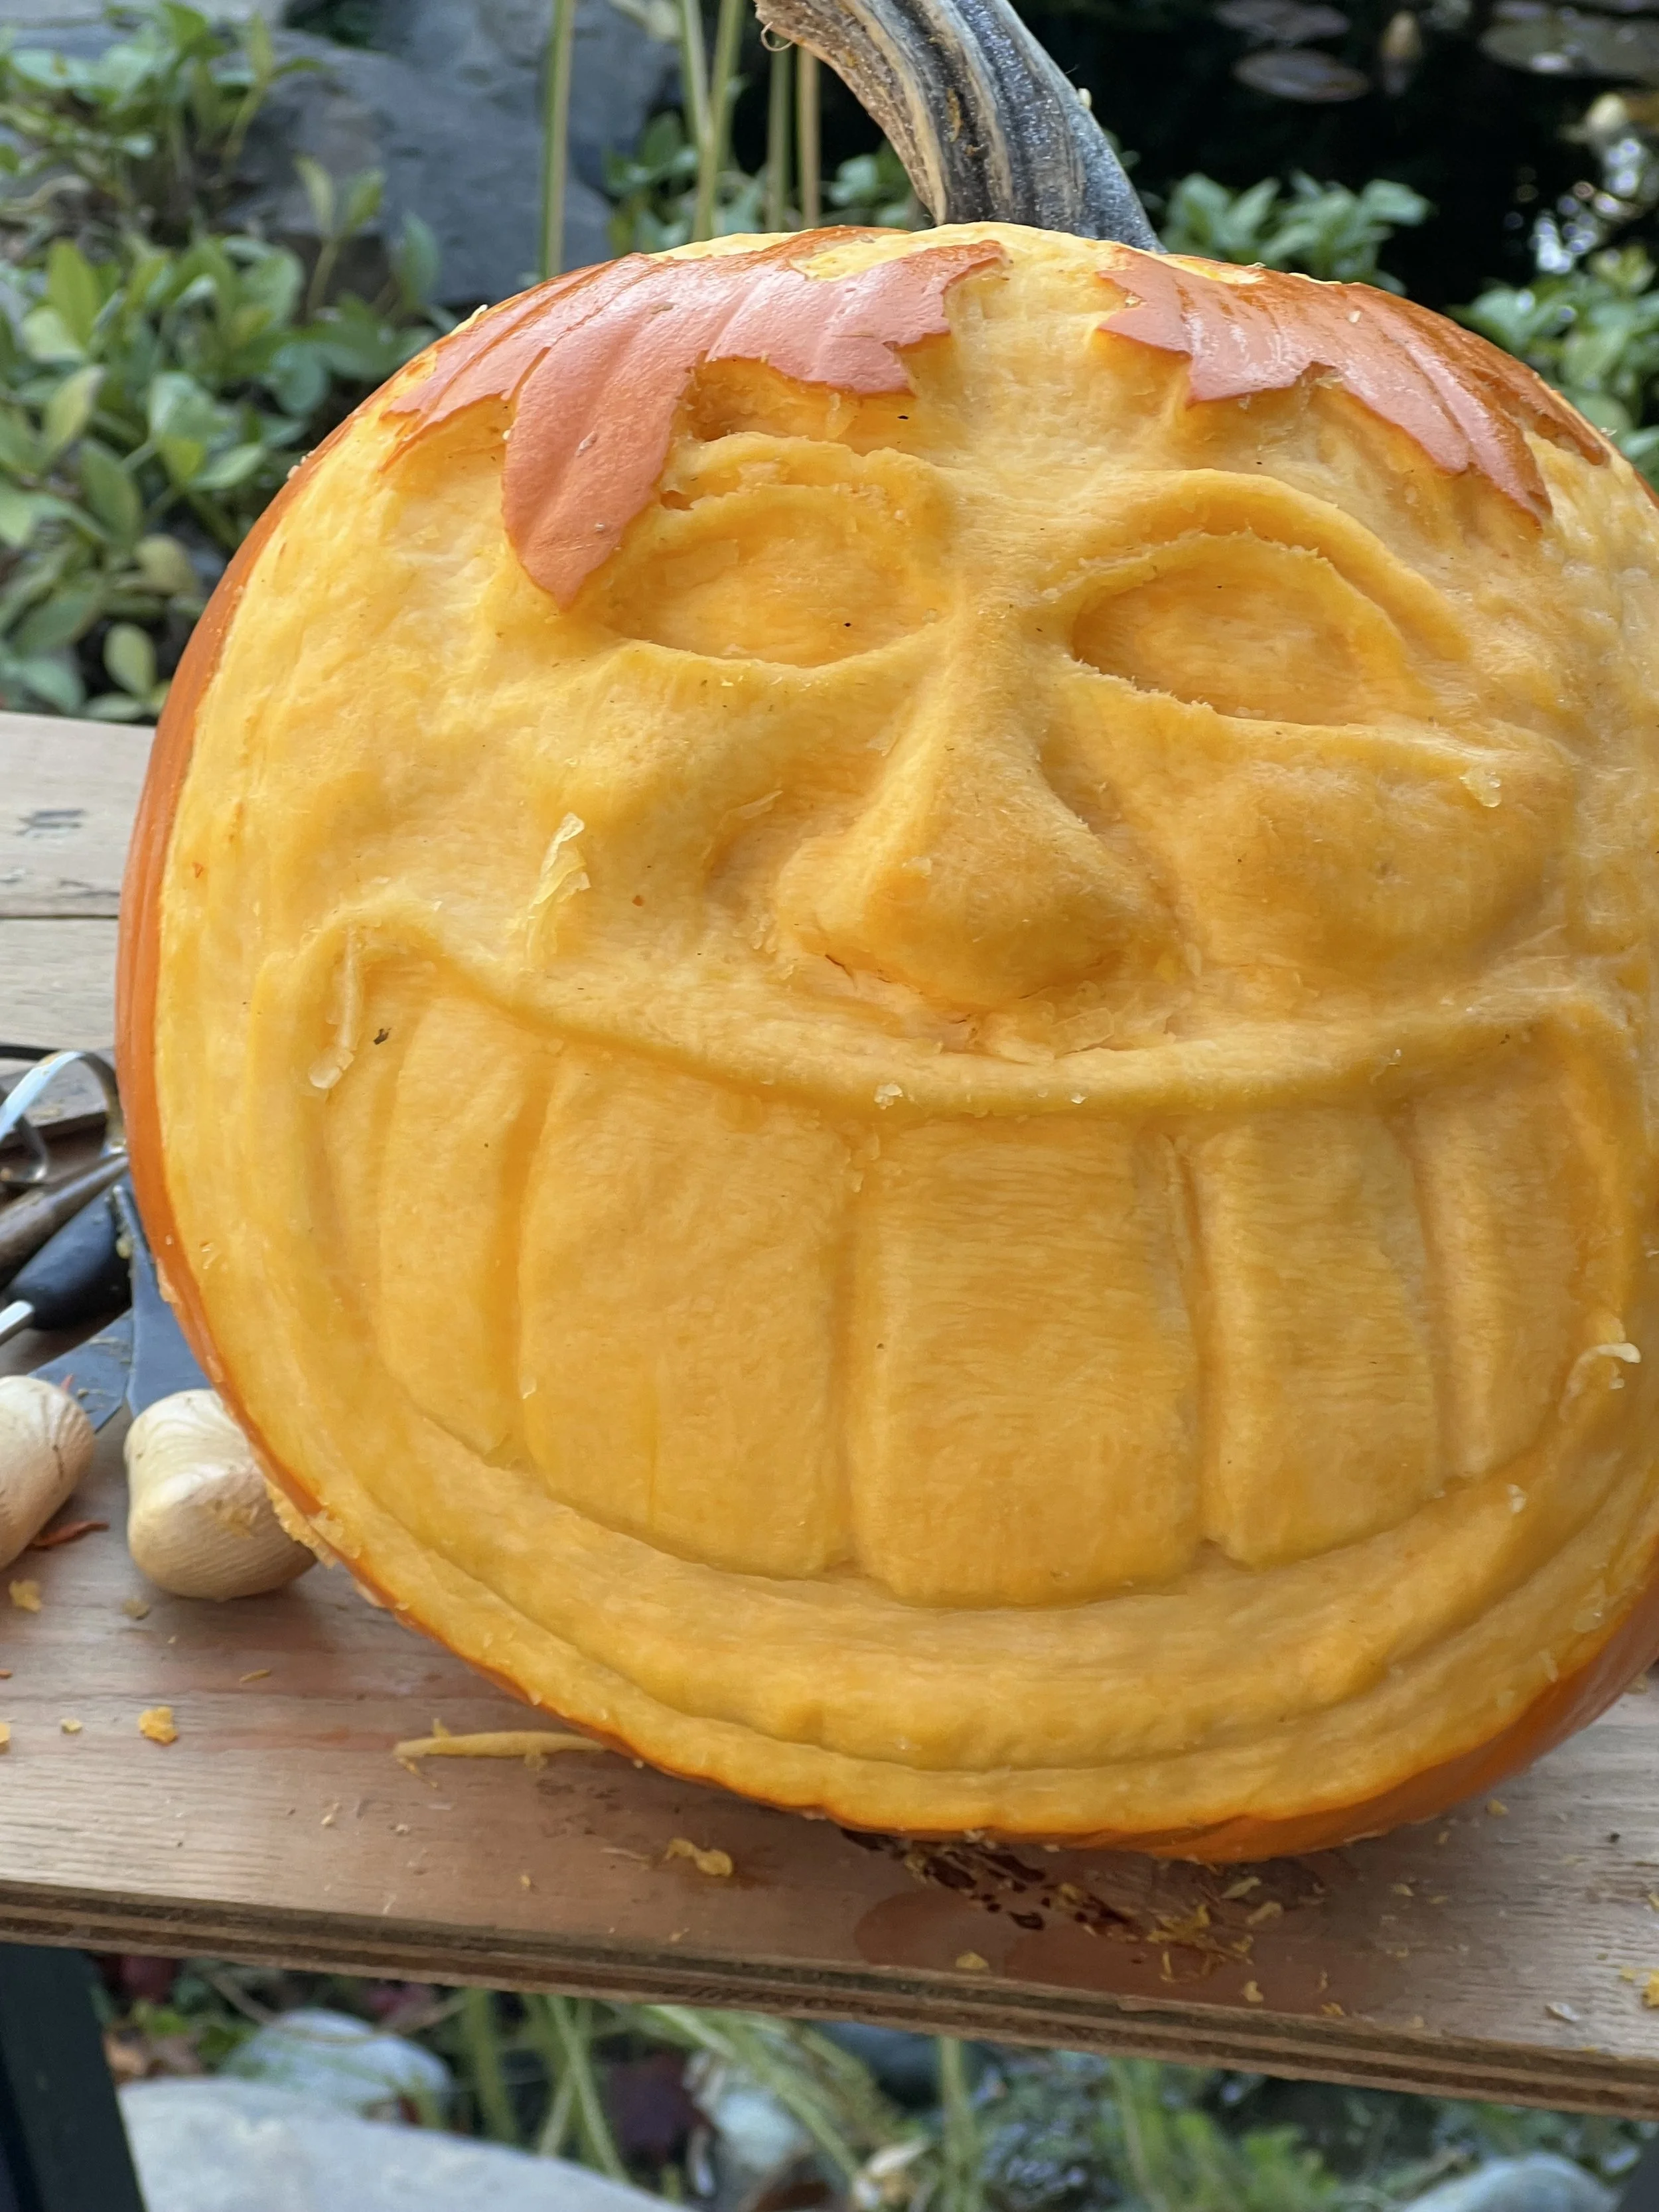
To help the teeth stand out, cut down below the uppers so that the lower teeth will be under the upper teeth. Also note how I have rounded the teeth on the sides and bottoms, so they look more natural
Step 9:
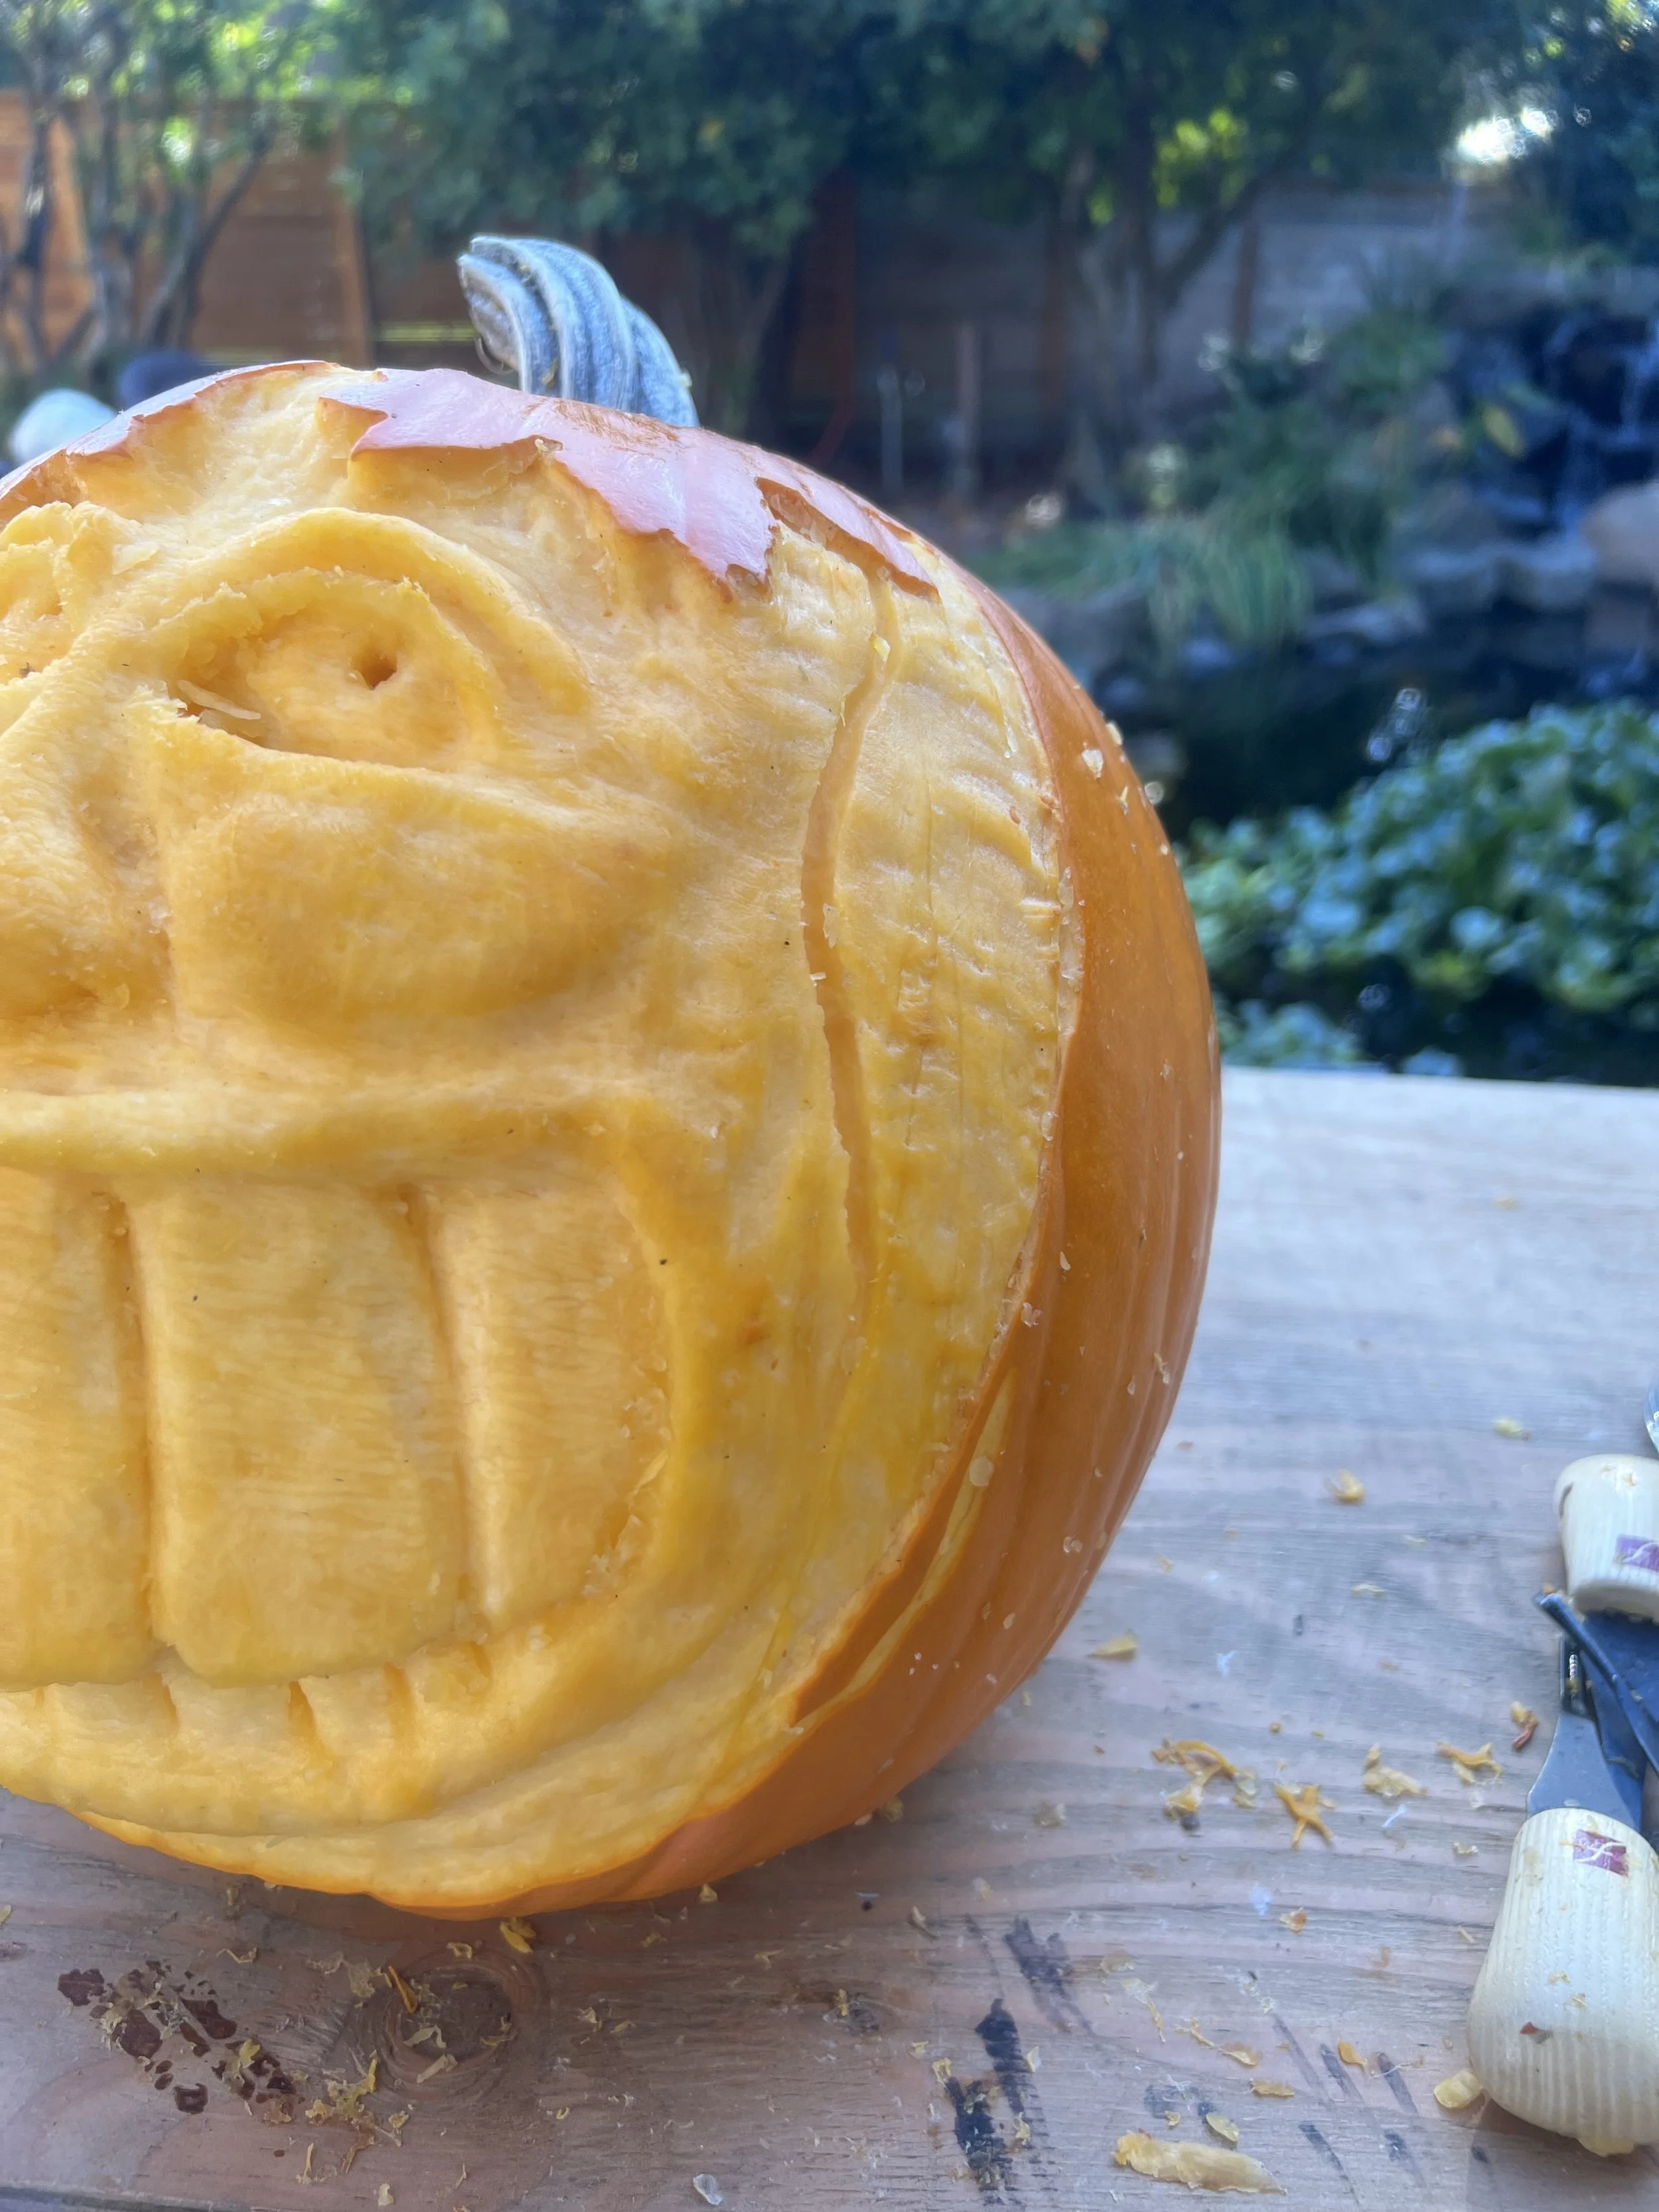
Almost done! Cut or scrape away the sides of the face to help it stand away from the natureal curve of the pumpkin. Try not to go thru the pumpkin to the hollow center as it will spoil faster if it is cut into too deeply.
Step 10:
The final step is to smooth with a rough cloth or a light brush….the image above has just been started on the smoothing. I willl douse it in vinegar to slow down the spoiling process and depending on the weather, this one will last a week or so. If you have hair spray, that has a light touch of lacquer that can help preserve your critters.